Showing posts with label part. Show all posts
Showing posts with label part. Show all posts
Wednesday, February 12, 2014
Racking The Quilts Part III
With the initial Quilt Rack assembly done and joints cut, I was finally ready to begin shaping. I began by cutting out the template from the ¼” hardboard. I rough cut with a jig saw and then used my spindle sander to bring it to the line and massage the final shape.
 |
| I had to cut out the template before cutting out the legs. |
 |
| As with most classically trained quilt rack makers, I prefer to perform my template routing in the dark. I shifted the clamps as necessary to allow the router to go around. |
 |
| I wish Festool could tell me how Im supposed to hold down the green ratcheting button and the router itself with one hand while working the wrench with my other hand. (I know this is a photo of the bit going on. My difficulty was with taking it off). |
 |
| The legs after having the quarter round routed on the edge. |
 |
| This close up shows how the curve doesnt look organic when it just off the router. |
 |
| This photo doesnt do it justice, but going over the edge with my rasp (& then many grits of sandpaper) make the edge much more organic and pleasing. |
 |
| In order to rasp the edge, I clamped the legs in my end vise, shifting them a few times each to keep the clamping pressure near where I was rasping. |
 |
| The cross members after routing and before sanding. |
Now that the shaping is done, its time to move on to assembly next.
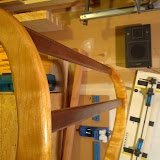 |
| Quilt Rack Photo Gallery |

Monday, February 10, 2014
Saw Storage Upgrade Part II
I gave some thought to making another till for my bench saws, or maybe some kind of cabinet, but in the end I decided to stick with the hanging panel idea. One thing I really like about tool holding panels is how easy it is to see and get at everything. Plus, I like how it looks; a kind of "shop art".
The new panel would hang from the French cleat system I use in my shop. Basically, this works by having two boards, each with 45° angles, that interlock. One board is attached to the wall, and the other is attached to the back of whatever you are hanging. In my shop, I have a continuous cleat running along the walls. This makes it very easy to hang and rearrange all sorts of things: panels, tills, shelving units, miter boxes, postdrills etc.
One thing that needs to be addressed is how to attach the corresponding cleat to the unit being hung. Most things hung in my shop simply have the cleat glued and screwed to the back of the frame at the top. This is long grain to long grain, and therefore wood movement is not an issue. Sometimes the cleat must be attached cross grain, and here wood movement could be a problem. On relatively narrow cross grain joints, such as the single 1x12 panel that holds my braces, I dont worry too much about it. I just screw it on and only glue it in the middle. Larger cross grain joints, such as the one on this new saw panel, are a different story.
To get the width I wanted for the new panel, it would be made from three 1x10 boards. If I used glued butt joints to join the boards into a single 27 inch wide slab, movement could become fairly significant. If I then just screwed the cleat across the back, the board would most likely split as it tried to move. I could have used slotted holes for the screws, but instead I decided to just use unglued T&G (tongue & groove) joints and attach each board to the cleat separately. This way, each board is free to expand and contract independently, while the T&G joints keep everything aligned and looking good - i.e. no wall visible through gaps between the boards.
The first step was to joint the edges so that they would be nice and straight. This picture might be a little confusing. I jointed the boards on edge, and then lay them flat to see how they fit. I wasnt using the #8 jointer to plane the faces (although I could have if I wanted to - "Breaking the law! Breaking the law!").

To make the T&G joints I used my Stanley #49. It has an eccentric swinging fence that allows it to cut both the tongue and the groove. Originally, it would have come with an extra wide iron for use on thicker boards. This would allow it to remove all the wood to the right of the tongue. I dont have that, so the extra "tongue" will have to be removed next. I wanted the tongue offset to the backside of the board thickness to allow room for forming a bead along the edge.

To remove the leftover wood, I used my small rabbet plane. I set it for a thicker shaving to speed things up.

Then it was time to make the side beads:

After that, I cleaned up the show faces with my #3 smoother. Its amazing how much better the wood looks after the scalloped machine planing marks are removed.

As a side note, it was while using those last four planes that I shot the images for the Planes and Shavings post.
This next sequence shows how I make my French cleats. Its funny, but I remember how much of a challenge this was the first time I had to do this after getting rid of all my power tools. I just didnt have my "hand tool brain" going strong yet. Really, its quite simple and rather easy.
First, with a marking gauge set to the thickness of the board, I scribed a line down one face of the board. I also put pencil marks across the top to make it easier to see the bevel as it develops.

Then I remove the bulk of the waste with a drawknife. You could also do this with a scrub plane, or even a jack plane; but they would both be slower than the drawknife.

Finally, I cleaned things up with a jack plane. The secret is to keep the bevel developing evenly as you go. Its not hard once you get the knack, and you could do any bevel angle you want the same way.

After the bevel was complete, I attached the cleat to the top rear of the panel. I chose to use finish screws near the center of each board. I used a 1/4 inch forstner bit in my hand drill to create the counterbore (which I later plugged).

After boring pilot holes with another hand drill I drove the screws with a 6" swing brace. I love using these small braces for driving screws. They provide plenty of torque, are the original "variable speed" driver, and have a great sense of feedback that beats any cordless drills clutch feature. The smaller size allows for quicker driving.
One problem I ran into was sinking the screws too deep for the driver bit to reach. I had to get creative. In the end, I filed off the tang on a triangular file until it matched the square driver hole in the screws, and then used a pair of Vise-Grips as a 90° handle. Worked great.

And heres the new panel in place; looking spiffy - but empty:

I spent the next few weeks making various holders for the saws. Nothing tricky, just a lot of finicky work getting the fit just right.

And heres the panel with the saws:

I quite like it - makes me happy every time I look at it. Im also happy to be finished. It took a lot longer than I was planning.
Well, its mostly finished anyway. I saved one spot next to the Lie-Nielsen dovetail saw for an old Disston dovetail saw I am going to finish fixing at some point. I started working on it over a year ago, but it turned into a disaster of saw plate flattening: "Just one more tap of the hammer... tap... hmm... maybe... tap... No!... Arrgh!" Its hopeless, and Ill need to completely replace the saw plate - later.
Let There Be Light Part I
A few months ago, my good friend Aristotle Dreher starter Arisitotle Photo. In order to assist with his fancy studio shots, he asked me to make him a light ring. He’s a good friend, who’s done all my shirt and blog design work, so how could I say no (it also seemed like an interesting project)?
 |
| The raw materials. |
The light ring consists of 12 light sockets arranged in a circle. The middle of the circle is open and the camera is placed there and the photo taken through the ring. This provides balanced light on all sides of the image (or at least this woodworker thinks it does).
 |
| Determining the ring layout. |
I began the light ring project by buying 12 cheap plastic light sockets. I asembled them in a circle, and used that to determine the size of the ring. I also used the width of their bases to determing the width of the ring. I left about ½” of space between the sockets and on the inside and outside edges.
The ring itself is constructed from two (2) pieces of Baltic Birch plywood. The front piece is ¾” thick. This was the first piece I made. Because all of the circles are referenced off the center, I worked from the outside to the inside so that I didn’t cut out the middle and then realize I still had to reference it.
After determining the outside diameter of the ring, I marked it out and cut close to the line with my jig saw. Then I built a trammel out of scrap Baltic Birch and routed exactly to the line with a fixed base router and ¾” diameter straight bit.
 |
| The outside is milled. |
Once the outside circle shape was finished, it was time to route the wire trough. This trough is centered on the width of the light ring. I made it using the same ¾” straight bit. I used a small piece of wire to determine the proper depth using relative dimensioning.
 |
| When routing with a trammel, plunge routers are more versatile. |
 |
| The center trough is milled. |
I routed the center trough in three (3), roughly equal depth passes. The feed rate was nice and slow and I thoroughly vacuumed between passes. It still resulted in a bit of burn on the wood and on the router bit. Since it’s a functional (rather than aesthetic) piece, I’m not sweating any burn.
 |
| Just about done with the front ring. |
Once the Center trough was done, I re-set the trammel again and hit the inside of the ring. I paused briefly and considered switching to a narrower bit for the inside (as I only needed to cut through, not create a trough wide enough to house wire), but since the trammel was already set up for the ¾” bit in the router I just went ahead and routed. I again made it though in 3 passes and had about the same level of burning as I did for the trough.
 |
| The connecting trough. |
I finished the center piece by routing one (1) more trough connecting the center trough to the outside edge at the bottom. This trough will allow access for the power cable. I first made this trough with a pattern bit to keep it straight, but when it proved too shallow, I deepened it with router freehand.
Next, on to the back . . .
Pencil Post Bed Cherry Part 1
A few years ago I decided to undertake a project that I thought would be no problem; a King sized pencil post bed. After all, it only had 9 pieces, how hard could it be? Well, the challenge with this bed was the fact that I had not dealt with single pieces of wood this large as a finished size. First, it is important to note that all the pieces are made from a single piece of solid cherry, not pieces glued together to make thicker pieces. The posts were made from 12/4 cherry, to a finished size of 2.5"x2.5" and the rails from 6/4 cherry, to a finished size of 1.5"x6". Selecting the stock was tricky because I needed to find pieces wide enough, long enough, and relatively straight enough; I needed as straight of grain stock as I could find.
So, after picking through stock at my local lumber store, Peach State Lumber, I came home with this stash.
The pieces were pretty straight, no curves or bows in them, but they did have a cup in them. With all pieces having a finished length of over 70+", they were too big for my power tools so it was off to hand tools. I started by hand planing one side as flat as possible, then I could feed it through my power planer. This is the setup for hand planing them flat.
You can see in this picture below how I use chalk to keep up with my progress, while also checking with a square. Anywhere chalk shows up, I know there is still more to be taken away.
Finally! After a couple days of planing, and thinking my arms were going to fall off, I have a flat side.
Now that I had one flat side, I could use my power planer to do the other side and go to final thickness. I had to use some out feed supports due to the length.
Once I had all the pieces milled to thickness, it was back to the hand plane to flatten and smooth one edge.
Once that edge was smooth, I could rip the pieces on the table saw to near finished width, leaving myself a little room for cleanup with a hand plane again.
That takes care of the milling of all the wood. In the next part, I will talk about the process of creating the pencil tapers, and how nerve racking that was, as well as creating the lambs tongue detail.
Read More..
So, after picking through stock at my local lumber store, Peach State Lumber, I came home with this stash.
 |
| From PencilPostBed |
The pieces were pretty straight, no curves or bows in them, but they did have a cup in them. With all pieces having a finished length of over 70+", they were too big for my power tools so it was off to hand tools. I started by hand planing one side as flat as possible, then I could feed it through my power planer. This is the setup for hand planing them flat.
 |
| From PencilPostBed |
You can see in this picture below how I use chalk to keep up with my progress, while also checking with a square. Anywhere chalk shows up, I know there is still more to be taken away.
 |
| From PencilPostBed |
Finally! After a couple days of planing, and thinking my arms were going to fall off, I have a flat side.
 |
| From PencilPostBed |
Now that I had one flat side, I could use my power planer to do the other side and go to final thickness. I had to use some out feed supports due to the length.
 |
| From PencilPostBed |
Once I had all the pieces milled to thickness, it was back to the hand plane to flatten and smooth one edge.
 |
| From PencilPostBed |
Once that edge was smooth, I could rip the pieces on the table saw to near finished width, leaving myself a little room for cleanup with a hand plane again.
That takes care of the milling of all the wood. In the next part, I will talk about the process of creating the pencil tapers, and how nerve racking that was, as well as creating the lambs tongue detail.
Wednesday, February 5, 2014
Upper pull out cabinet project Part II
After much debate, the upper tray is complete. The owner wanted to finish the face of the tray himself, which I agreed to. However, this is a good example of the flexibility in have things custom made. This customer now has a fully functioning pull out tray cabinet that matches the surrounding cabinets, and also accommodates the over sized fridge...


Read More..
Subscribe to:
Posts (Atom)